How to Check Load Capacity of a Truck
Learn how to check load capacity of a truck with step-by-step methods, from reading GVWR/GAWR labels to weighing and verifying per-axle limits. Includes safety tips, practical calculations, and documentation guidance.

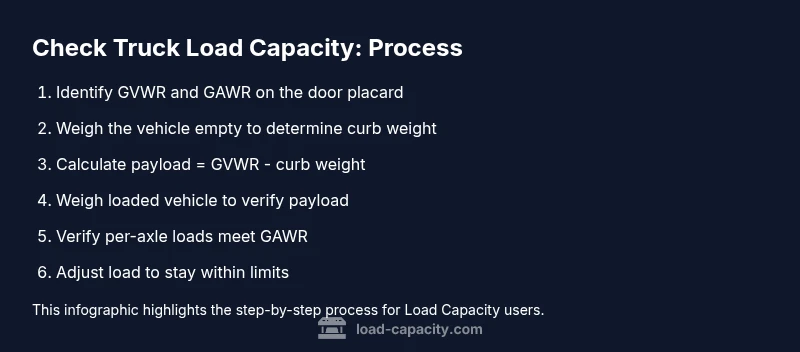
By the end of this guide you will be able to determine your truck's safe payload, identify GVWR and GAWR on the vehicle label, compute payload as GVWR minus curb weight, and verify per-axle limits using scales or weigh stations. According to Load Capacity, proper load planning reduces risk and extends vehicle life.
Understanding truck load capacity: GVWR, payload, GAWR
To answer how to check load capacity of truck, you must start with the three core figures: GVWR, GAWR, and payload. GVWR is the maximum vehicle weight allowed, including fuel, passengers, and cargo. GAWR, or gross axle weight rating, sets the limit per axle. Payload is the actual load the truck can carry after subtracting curb weight (the vehicle's weight with no cargo, fluids, or passengers) from the GVWR. Understanding these numbers helps you plan safe, legal loads and avoids overloading. According to Load Capacity, the trio—GVWR, GAWR, and payload—drives every loading decision and underpins safe operation. Practical loading decisions hinge on knowing these limits before any shipment leaves the dock or job site.
Key components and definitions you need
- GVWR (Gross Vehicle Weight Rating): The maximum combined weight of the vehicle and its cargo allowed by the manufacturer. Think of it as the ceiling for everything you put on the truck.
- GAWR (Gross Axle Weight Rating): The maximum load that can be carried by each axle. This prevents overloading axles and protects tires, brakes, and suspension.
- Payload: The actual weight you can add to the vehicle without exceeding GVWR, calculated as GVWR minus the curb weight.
From a management perspective, Load Capacity analysis shows that the critical factor is keeping the sum of payload and vehicle weight under GVWR while maintaining per-axle limits. Even small shifts in weight distribution can push an axle past its GAWR, which can trigger tire wear and braking impairments.
Planning your measurement approach
Before you touch a single item on the scale, plan your measurement approach. Decide whether you will weigh the vehicle empty to determine curb weight (recommended) or use published data if scales are unavailable. Gather the exact GVWR and GAWR values from the door placard or owner’s manual. Secure all weight-relevant details in a log so you can reproduce or adjust loads accurately for future trips. This planning phase reduces errors and makes subsequent weighing faster and more reliable.
Reading labels and using manufacturer data
Locate the GVWR and GAWR values on the driver-side door jamb placard or the vehicle manual. GVWR is the total limit for the vehicle; GAWR is the per-axle limit. Compare these figures with your planned cargo and passenger weight. Keep in mind that fuel, fluids, and optional equipment can push the actual weight toward the GVWR. Reading and interpreting these labels correctly is essential for compliance and safety.
Real-world loading scenarios and adjustments
In real operations, distribution matters as much as total weight. A payload that’s heavy on the rear axle can overpress the rear tires even if overall weight stays under GVWR. Plan the load to balance weight across axles and maintain appropriate tire pressures. If you observe uneven wear or soft handling, revisit distribution and re-measure. Load planning should account for dynamic effects such as braking, cornering, and road grade.
Documentation and ongoing checks
Maintain a simple load-record log that captures scale tickets, curb weight, calculated payload, and axle weights when possible. Use these records to validate that future loads remain within limits, and to train drivers or operators on safe loading practices. Consistency here supports regulatory compliance and smoother audits. Over time, this documentation becomes a valuable reference for fleet-wide safety standards.
Safety-first and compliance
Always follow local regulations and manufacturer guidelines when loading. Underloading can harm performance and stability, but overloading increases braking distance, tire risk, and legal exposure. Before each trip, verify that your planned load respects GVWR, GAWR, axle distribution, and tire ratings. The Load Capacity team emphasizes conservative planning and verification to prevent avoidable failures.
Tools & Materials
- Vehicle GVWR plate or sticker(Locate on door jamb or owner's manual)
- Vehicle scales or weigh station(Prefer static weigh for accuracy)
- Calculator or smartphone calculator app(Compute payload and per-axle loads)
- Pen and notebook or digital log(Record weights and calculations)
- Tire pressure gauge and spare torque tool(Check tires before weighing; adjust pressure as needed)
- Weigh tickets and documentation(Keep for records and audits)
- Manufacturer manual(Reference GAWR/GVWR values and procedures)
- Chalk or tape for markings(Mark wheel positions to verify scale alignment)
Steps
Estimated time: 60-90 minutes
- 1
Identify GVWR and GAWR on the vehicle label
Read the GVWR and GAWR values from the door placard or owner’s manual. Note which numbers apply to the gross vehicle, and per-axle limits. This is your baseline for all subsequent calculations and ensures you don’t exceed design limits.
Tip: Double-check both front and rear GAWR values to catch any axle-specific limits. - 2
Determine curb weight (unloaded vehicle weight)
Weigh the truck without cargo, driver, or passengers to establish curb weight. If a full weigh isn’t possible, use official manufacturer data or a recent scale ticket as a baseline.
Tip: Ensure fluids are at normal operating levels to avoid skewed results. - 3
Calculate payload capacity
Compute payload capacity as GVWR minus curb weight. This figure represents the maximum cargo and occupants you can add under the GVWR maximum.
Tip: If you’re close to the limit, reassess the trip plan to reduce payload or shift weight distribution. - 4
Weigh the vehicle with planned payload
Take a second weigh-in with the intended cargo and occupants. Compare the loaded weight to GVWR to confirm you stay within the limit.
Tip: If there’s no ready scale, use calibrated portable scales or a weigh bridge at a nearby facility. - 5
Check per-axle weights
Ensure that the loaded weight is within the GAWR for each axle. This is critical for braking, steering, and tire safety.
Tip: Distribute heavy loads evenly across axles to avoid overload on one unit. - 6
Validate tire limits and clearance
Confirm tire load ratings match or exceed per-axle loads. Inspect tires for wear and ensure proper dual-tire load sharing where applicable.
Tip: Reinflate to the recommended pressure after loading; underinflation can reduce capacity and heat resistance. - 7
Document results
Record GVWR, curb weight, payload, and per-axle weights. Save the scale tickets for audits and future planning.
Tip: Maintain a consistent reporting format for easy trend analysis. - 8
Review and adjust for safety
If results exceed any limit, redesign the load plan or reallocate cargo. Confirm all steps are complete before departure.
Tip: When in doubt, aim for a conservative loading margin to account for dynamic loads.
Quick Answers
What are GVWR and GAWR, and why do they matter?
GVWR is the maximum total weight the vehicle is designed to carry, including cargo and fuel. GAWR is the maximum weight allowed on each axle. Both protect structural integrity, braking performance, and tire safety, and they determine legal load limits.
GVWR is the total weight limit for the vehicle; GAWR limits apply to each axle. Both protect safety and compliance.
How do I calculate payload when loading a truck?
Payload equals GVWR minus the curb weight. Weighing empty and loaded vehicle provides the most accurate payload. If you don’t have a scale, use approved manufacturer data and documented methods to estimate.
Payload is GVWR minus curb weight. Use scales for accuracy when possible.
Can I estimate load without weighing the vehicle?
Estimations are possible using manufacturer data and standard cargo weights, but scales provide the most reliable verification. Always verify per-axle limits when estimating.
You can estimate, but scales give the best accuracy for axle limits.
Why is per-axle load important?
Per-axle load governs GAWR. Even if the total weight is under GVWR, an overloaded axle can cause tire failure, braking problems, and legal issues.
Axle load matters for safety and compliance, not just total weight.
How often should I check load capacity?
Check before each long haul or when the cargo plan changes. Maintain records of scale readings and any adjustments.
Check before each trip and keep a log of readings.
Watch Video
Top Takeaways
- Know GVWR, GAWR, and payload before loading.
- Weigh empty and loaded weights to verify payload precisely.
- Distribute weight to preserve axle balance and tire safety.
- Document measurements for safety and compliance.
- Always err on the side of conservative loading margins.