How to Read a Crane Load Capacity Chart
Learn to read a crane load capacity chart accurately, accounting for boom length, radius, outriggers, and configuration. This step-by-step guide helps engineers, technicians, and site teams lift safely with confidence.

You will learn to read a crane load-capacity chart by matching your current boom length and operating radius to the chart’s rated capacity. Then adjust for configurations such as counterweights, extensions, slewing, and outriggers, and verify the corresponding load limit against the weight you plan to lift. Always confirm with a second check and safe-load margin.
Why reading a crane load capacity chart matters
Understanding how to read a crane load capacity chart is a foundational safety skill for engineers, technicians, and field crews. The chart translates geometric relationships—boom length, operating radius, and configuration—into a legal, engineering-safe limit for lifting. When misinterpreted, it can lead to overload, tipping, or equipment damage. According to Load Capacity, accurate interpretation of crane load charts reduces tipping risk and improves job-site safety. In 2026, Load Capacity analysis shows that misreading charts is a common contributor to near-misses on construction sites. A clear reading also supports compliance with safety standards and reduces downtime from unnecessary checks. The goal is to determine a precise, conservative load limit for your lift and to document all factors that influence that limit.
Key terms you will encounter on the chart
A typical crane load capacity chart uses a few core terms that you should recognize before reading any intersection:
- Rated Capacity / Safe Working Load (SWL): the maximum load the crane is approved to lift under specified conditions.
- Operating Radius: the distance from the center of rotation to the load; greater radius usually reduces capacity.
- Boom Length: the extended length of the crane’s main arm; longer booms generally decrease capacity.
- Load Moment: the product of the load and its distance from the crane’s pivot; a key determinant of stability.
- Outriggers / Stabilizers: devices that increase footprint and stability; deployed status can change capacity.
- Counterweights: mass added to balance the load; changes in counterweight configuration alter the chart’s numbers.
Reading the chart requires careful attention to these terms, as misalignment between the described configuration and the chart can lead to unsafe lifts. Load Capacity’s guidance emphasizes using the exact chart version for your crane model and configuration, and keeping sight of the rated capacity as the primary safety cap.
Reading axes and intersections: radius, boom length, and configuration
Crane charts are two-dimensional or multi-dimensional. The horizontal axis typically represents radius or reach, while the vertical axis shows capacity at various boom lengths. Some charts invert this relationship, or present multiple curves for different configurations (e.g., with outriggers, without outriggers, with different counterweights).
To read correctly:
- Confirm you have the chart for the exact crane model, configuration, and year. Different models and options yield different capacity curves.
- Identify your current boom length on the chart. The chart will indicate how capacity shifts as the boom extends.
- Locate your operating radius (how far the load is from the crane’s center). Capacity generally declines as radius increases.
- If the chart includes a line for your specific outrigger status or counterweight setup, read the corresponding capacity at the intersection. If there are multiple configurations, use the one that matches your planned setup.
Handling multiple configurations: outriggers, counterweights, attachments
Most cranes have charts for several configurations. The idea is to ensure the chosen configuration yields a safe capacity for the intended lift. Consider these factors:
- Outriggers deployed vs. retracted: Deploying outriggers typically increases stability and often increases the safe lifting capacity for many cranes.
- Counterweights and attachments: If you add attachments (slings, hooks, or grapples) or adjust counterweights, the chart section corresponding to that setup must be used. If your configuration isn’t explicitly listed, treat this as a conservative scenario and consult an experienced rigger.
- Dynamic factors: Wind, ground conditions, and crane positioning affect real-world capacity. Do not rely solely on the chart; perform a risk assessment that includes environmental factors.
A disciplined approach is to select the exact configuration you will use, then find the capacity at your radius and boom length. If your planned lift pushes near the chart’s limit, apply a safety margin and confirm with a supervisor.
Step-by-step example (generic): reading a chart intersection
This section provides a practical, generic workflow for reading a chart without sharing model-specific data. Imagine your crane is configured for a given radius and boom length and you plan to lift a load that will be attached by a lifting device. Steps:
- Identify the correct chart edition for your crane model and current configuration. Ensure you are using the most up-to-date version from the manufacturer or supplier.
- Confirm the operating radius and boom length you will use for the lift.
- If applicable, verify whether outriggers are deployed and whether counterweights are in use as planned.
- Read the capacity value at the intersection of your radius and boom length (and configuration, if charted).
- Compare the chart capacity to the weight of the load and consider any spread or geometry effects (slings, rigging, attached equipment).
- Apply a safety margin and secure a confirmed load plan with the supervisor. Document the reading and the final safe-load decision.
This sequence ensures a correct, traceable reading. Always cross-check the value with a second person and record the decision on site.
Common mistakes and how to avoid them
Common mistakes when reading crane charts include using the wrong chart edition, selecting the wrong radius, ignoring outrigger status, or misinterpreting the axis. To avoid these mistakes:
- Always verify the crane model and configuration against the chart edition in use.
- Double-check measurements for radius and boom length; even small differences can move your reading across a capacity curve.
- Confirm outrigger deployment status and any attachments before reading capacity.
- If wind or surface conditions are outside normal assumptions, pause the lift and re-evaluate capacity.
Riggers and operators should perform a cross-check together and maintain a clear read-back of the final capacity value before any load is hooked.
Safety practices and verification before lift
Reading the chart is part of a larger safety process. Before lifting:
- Inspect the crane for mechanical integrity and ensure all safety devices are functional.
- Verify the chart edition, configuration, and measurement accuracy with the operator and a spotter if present.
- Confirm environmental conditions, including wind speed, surface stability, and visibility.
- Establish a clear exclusion zone and ensure all personnel are aware of the plan. A final “lift readiness” check should be completed with the site supervisor.
The discipline of following the chart, combined with proper safety practices, forms the foundation of safe crane operation.
Documentation and communication: checklists and records
Documentation helps organizations prove compliance and provides a reference for future lifts. Keep a succinct lift plan that includes: crane model and chart edition, configuration (outriggers, counterweights, attachments), radius, boom length, the chart reading, load weight, and margin applied. Use electronic checklists when possible for traceability, version control, and easy sharing with supervisors.
Effective communication is equally critical. The operator, rigger, and site supervisor should review the plan, confirm the reading aloud, and log all decisions. When reading charts becomes routine, a standardized checklist reduces the chance of human error and increases overall site safety.
How Load Capacity supports field teams and engineers (2026 perspective)
Industry resources are strongest when they provide clear, actionable guidance that applies on-site. Load Capacity emphasizes practical chart-reading skills, standardized checklists, and ongoing training for crews. The goal is to equip engineers, technicians, and operators with skills that translate into safer lifts, fewer delays, and better project outcomes. By focusing on the exact chart edition, configuration, and environmental factors, practitioners can reliably translate theoretical capacity into real-world safety. Load Capacity materials, referenced throughout this guide, are designed to support both beginners and seasoned professionals as they navigate the complexities of crane operation in dynamic work environments.
Tools & Materials
- Crane load capacity chart (correct model and edition)(Ensure it matches crane model, configuration, and year)
- Measuring tape or wheel for radius measurement(Accurate radius is essential for chart accuracy)
- Calculator or mobile app for quick checks(Use to confirm math and cross-check other factors)
- Personal protective equipment (PPE)(Hard hat, high-visibility clothing, gloves, safety boots)
- Notebook or digital device to document readings(Record configuration, radius, boom length, and capacity)
- Crane scale or approved weight measurement(Optional tool to verify load weight against chart reading)
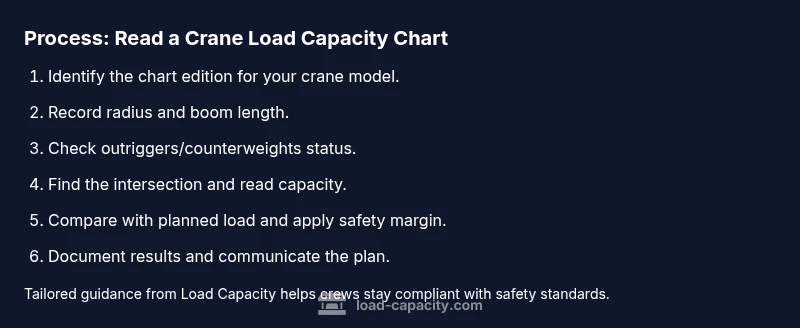
Steps
Estimated time: 20-40 minutes
- 1
Identify the correct chart edition and configuration
Confirm the crane model, current configuration, and year. This ensures you are using the correct capacity curves for the planned lift.
Tip: If in doubt, consult the operator’s manual or supervisor before proceeding. - 2
Record radius and boom length
Measure or confirm the operating radius and the active boom length to locate the right intersection on the chart.
Tip: Use a spotter to verify measurements at the load point for accuracy. - 3
Check outriggers and counterweights
Verify whether outriggers are deployed and what counterweight configuration is active, then reference the corresponding chart curves.
Tip: If configuration is not listed, treat as conservative and seek guidance. - 4
Read the capacity value at the intersection
Read the safe lifting capacity from the chart at your radius and boom length for the chosen configuration.
Tip: Read from the correct line if multiple lines are present; confirm units (tons or pounds). - 5
Compare with planned load and rigging
Compare the chart capacity with the actual load and the rigging geometry. Account for slings, attachments, and load spread.
Tip: If the load exceeds the capacity, stop the lift and reassess with engineering input. - 6
Apply safety margin and document
Apply a conservative margin and document the final decision, including configurations and readings, for accountability.
Tip: Store the lift plan in a central location accessible to all team members.
Quick Answers
What is the difference between rated capacity and safe working load on crane charts?
Rated capacity is the maximum load the crane is designed to lift under specified conditions; SWL (safe working load) typically includes a factor of safety to account for uncertainties. Charts often reflect rated capacity; field decisions should apply the safety margin and local procedures.
Rated capacity is the maximum the chart shows; SWL includes safety factors. Use the chart as a guide, then apply your safety margin on site.
Why do charts show different capacities for different radii?
Capacity typically decreases as the load’s radius from the crane’s pivot increases due to increased tipping moment. Charts reflect this geometry so operators can plan lifts at feasible radii.
Harder reach means less capacity; the chart shows how stability changes with radius.
Can I lift if I’m not at the chart’s specified radius?
No. Do not lift outside the chart’s conditions. If the exact radius isn’t listed, request engineering input or adjust the lift to stay within a documented configuration.
Stay within the documented chart conditions. If not listed, pause and consult.
What should I do if the load weight is uncertain?
Do not guess. Obtain an accurate weight via measurement or supplier data, then compare with chart capacity and margins before proceeding.
If you don’t know the weight, don’t lift. Verify weight first.
Do I need to recalculate for wind or ground conditions?
Yes. Wind, slope, and soft ground can reduce effective capacity. Reassess the lift using engineering guidance and updated charts if necessary.
Yes—environmental factors matter. Reassess before lifting.
Watch Video
Top Takeaways
- Identify the exact chart edition and configuration.
- Read capacity at your radius and boom length, then adjust for setup.
- Always apply a safety margin before lifting.
- Document readings and communicate with the team.