D Shackle Load Capacity Chart: Reading, Sizing, and Safety
Learn how to read a d shackle load capacity chart, interpret WLL and MBS, and apply best practices for safe lifting with shackle sizing and material guidance. Includes illustrative ranges and practical usage tips for engineers and technicians.

A d shackle load capacity chart lists the rated working load limit (WLL) and minimum breaking strength (MBS) by shackle size to help engineers select the right hardware. It also shows pin type and material, so you can match the chart to your lifting scenario. For safety, always use a chart matching your shackle grade and your rigging configuration.
Why the D Shackle Load Capacity Chart Matters
According to Load Capacity, the d shackle is a simple, versatile lifting link, but its safety hinges on correct sizing and matching the chart to real-world rigging. The load capacity chart translates physical dimensions—diameter, internal width, and pin style—into engineering-relevant numbers like WLL (working load limit) and MBS (minimum breaking strength). Engineers, technicians, and fleet managers rely on these charts to prevent overloading, pin failure, and misalignment that can cause catastrophic accidents. The chart also helps standardize procurement, ensuring the exact shackle grade and pin type align with a given task. As projects scale, a clear, up-to-date chart becomes a practical reference when planning lifts, documenting decisions, and training crew members. In short, a trustworthy d shackle load capacity chart is a pillar of lifting safety and operational reliability.
How to Read a D Shackle Load Capacity Chart
A quality chart typically presents columns for shackle size (by diameter or nominal size), WLL, MBS, pin type, and material. Context notes explain the safety factor used to derive the WLL from MBS, often reflecting industry practice and the specific grade of steel. Look for any color-coding or footnotes that indicate whether your task involves dynamic loads, angles, or multiple shackles in parallel. Always confirm that the chart is current and that the shackle you select matches both the grade and the manufacturing batch. When in doubt, contact the supplier or consult the manufacturer’s data sheet. The chart should be treated as a live document—update it whenever new batches are introduced or standards evolve.
Size, Load, and Scope: Interpreting Ranges
Most charts provide ranges rather than single values for WLL or MBS because manufacturing tolerances, loading angles, and pin configurations influence actual performance. Use the chart as an initial sizing tool, then apply engineering judgment for your specific configuration. For example, a 3/8-inch shackle might appear in a chart with a modest WLL range, while larger sizes show proportionally higher MBS values. Always verify with field measurements and ensure that the applied load accounts for angles, chord length, and potential hitch points. When evaluating multiple shackles or anchors, avoid combining WLL values from separate shackles to stay within safe limits for the entire lash-up.
Practical Steps for Sizing and Selection
- Identify the task and required lift capacity based on the load. 2) Check the chart for the correct size and pin type. 3) Confirm WLL and MBS for the exact shackle grade and manufacturer. 4) Assess loading conditions (angles, sway, and dynamic factors). 5) Inspect the shackle’s condition and verify compatibility with slings, hooks, and shackles. 6) Document the chosen shackle and chart reference in your lifting plan. 7) Train the crew on chart interpretation and safe rigging practices. 8) Reassess the plan if the load changes or the environment shifts.
Practical Usage in Real Projects
In field operations, you will frequently face non-ideal conditions that reduce the effective WLL. The chart provides a baseline; operators must apply a margin for angle losses, potential side loading, and shock loads. When planning complex lifts with multiple shackles, consolidate the WLLs to avoid exceeding the capacity of any single link. If a chart entry does not precisely match your shackle, choose the next nearest size up and verify through a qualified engineer. Keeping spare shackles of slightly larger capacity on hand is a common safety practice.
Maintenance, Inspection, and Recording
Before every lift, inspect the shackle and pin for deformation, wear, or corrosion. Ensure the pin threads engage smoothly and that the locking mechanism remains secure. Clean off any grease or debris that could hide cracks. Record the shackle size, lot/batch information, WLL, and MBS from the chart in your lifting log. If the chart becomes outdated, replace it with the latest edition from the manufacturer or supplier, and re-train crew members on changes. An up-to-date chart reduces ambiguity and supports consistent decision-making across the team.
Standards, Updates, and Best Practices
Many industries rely on standardized charts provided by manufacturers, supported by safety guidelines from professional bodies. While the exact standards vary by region, the general approach remains the same: match the shackle size and pin type to the chart, apply the documented safety factor, and verify all data against the current data sheet for the product in use. Regular audits of charts, as well as routine crew training, help ensure that practice remains aligned with the latest safety expectations.
Case Study: Lifting a Heavy Load with a D Shackle
Consider a scenario where a crane lifts a load requiring 3 tons of capacity. The chart shows that a 1/2-inch shackle with a bolt-type pin and alloy steel construction offers a WLL within the 4–6 ton range, comfortably exceeding the requirement when used with proper rigging and angle control. The operator calculates the worst-case angle and multiplies the vertical component to verify the effective WLL remains above the load. After selecting the appropriate shackle, the team completes a pre-lift check, verifies field measurements, and records the decision for traceability.
Common Pitfalls and How to Avoid Them
- Using a chart that is not current or does not reflect your shackle’s grade. Always verify the edition and batch information.
- Overlooking load angles and side loading, which dramatically reduces effective WLL.
- Mixing sizes, grades, or pin types in a single rigging solution.
- Relying on a single measurement without field verification. Regular checks, including pre-lift inspections, are essential.
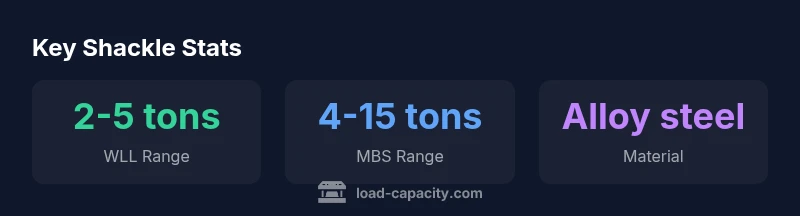
Illustrative ranges for common d shackle sizes and their WLL/MBS, based on typical alloy steel shackles.
| Shackle Size | WLL | MBS | Pin Type | Material | Notes |
|---|---|---|---|---|---|
| 3/8 in | 2-4 tons | 5-8 tons | Bolt | Alloy steel | Illustrative range |
| 1/2 in | 4-6 tons | 9-12 tons | Cotter pin | Alloy steel | Illustrative range |
| 3/4 in | 6-10 tons | 15-20 tons | Bolt/Cotter | Alloy steel | Illustrative range |
Quick Answers
What does WLL mean and why is it important on a d shackle load capacity chart?
WLL stands for Working Load Limit, the maximum load that a shackle is intended to lift under normal conditions. It is calculated with a safety factor against the material’s strength. Always use the WLL specified on the chart for the exact shackle size and grade you are using.
WLL tells you the safe lifting limit for the shackle size and grade. Always pick a shackle whose WLL meets or exceeds your load and conditions.
Can I use a larger shackle than the chart recommends for a given load?
No. Using a larger shackle than the chart recommends can still place unexpected stresses on anchors and rigging. If the load approaches the chart’s WLL, select a shackle with a higher WLL and re-check all rigging elements.
Never exceed the chart’s WLL. If in doubt, choose a larger shackle and re-check every part of the rigging.
How should I choose shackle size for slings and hooks?
Match the shackle size to the sling and hook dimensions, ensuring the pin type and material are compatible with the chain or rope. Always verify the combined assembly remains within the chart’s WLL. When in doubt, consult a qualified engineer.
Pick a size that fits all components—slings, hooks, and the pin type—while staying within the chart’s WLL.
Are there standards for d shackles and their load charts?
Yes, many regions reference manufacturer charts and safety guidelines. Always rely on the latest manufacturer data sheets and internal safety procedures. Use the chart as a starting point, then validate in the field.
There are standards and manufacturer guidelines you should follow; use the chart as your starting point and validate in the field.
What maintenance practices keep chart data accurate in the field?
Regularly inspect shackles and pins for wear, corrosion, and deformation. Keep the chart in a known, accessible location and ensure it’s updated whenever a new batch or grade is used. Train crew members on how to interpret updates.
Inspect regularly, keep charts updated, and train the crew on any changes.
“A correctly read load capacity chart is a safety-critical tool; misreading WLL or MBS can lead to catastrophic failures. The Load Capacity Team recommends integrating chart validation into every lifting plan.”
Top Takeaways
- Read the WLL and MBS on the chart before any lift.
- Match shackle size, pin type, and material to the load and rigging configuration.
- Account for angles, dynamic loads, and safety factors in the plan.
- Keep the chart current and train crew on interpretation.
- Document your sizing decisions for traceability.