Dead Load Capacity Calculator: A Practical Guide for Engineers
Learn how to estimate permanent dead loads with a practical calculator. Enter area, slab thickness, and material density to compute total dead load in kN and guide safe structural design.

What is the dead load capacity calculator and why it matters
In structural design, the dead load capacity calculator helps engineers estimate the permanent weight carried by a floor, beam, or platform. According to Load Capacity, this tool translates the physical properties of materials into a single, actionable metric. By inputting area, thickness, and density, you obtain a total dead load in kilonewtons and a per-square-meter value. This information is essential for comparing design options, supporting code compliance, and planning reinforcement strategies before construction. The concept of dead load is distinct from live load, which varies with occupancy and usage, and from environmental loads such as wind or snow. A precise dead load estimate ensures proper member sizing, safe connections, and a robust foundation. Regular checks during the early design phase save time and reduce risk downstream.
How to set up and use the calculator
Using the dead load capacity calculator is straightforward and designed for engineers, technicians, and students. Start by entering the floor area (in square meters), the slab or deck thickness (in meters), and the material density (in kilograms per cubic meter). The calculator applies a simple, representative formula to convert volume to mass and mass to weight, delivering a total dead load in kilonewtons (kN). You can then assess per-area loads to compare against minimum design criteria. Always verify inputs for consistency (units, thickness, and density) and revisit results if any assumption changes, such as a thicker slab or a higher-density material.
Beyond the math, use the results to check alignment with local building codes and industry standards. For complex assemblies, perform multiple runs with alternative materials or thicknesses to explore trade-offs between cost, weight, and performance. This tool is most effective when used early in the design process to guide material selection and structural detailing.
Understanding inputs and units
The calculator hinges on three core inputs: floor area, slab thickness, and material density. Area should be in square meters (m²), thickness in meters (m), and density in kilograms per cubic meter (kg/m³). The selection of density reflects the actual material in the element (concrete, steel, wood, etc.). Consistency is key: mixing units or using nonstandard density figures will distort results. The calculator converts the mass per unit area into a weight value using gravity, producing a result in kilonewtons (kN). This standard unit makes it easier to compare against design limits and safety factors.
Tip: when comparing options, run scenarios with alternative densities (e.g., different concrete mixes or lumber grades) to see how sensitive the dead load is to material choices.
The basic formula and unit conversions
The fundamental calculation is: Total Dead Load (kN) = area × deckThickness × materialDensity × g / 1000, where g ≈ 9.81 m/s². This accounts for the volume of material per area (thickness × density) giving mass per unit area, multiplied by area to obtain total mass, and finally converted to weight in kilonewtons. The division by 1000 converts newtons to kilonewtons. The calculator may also display a per-area value (kN/m²) for quick supervision of design limits. Always document the assumed gravity value and consistency of units in reports.
Real-world design considerations and case examples
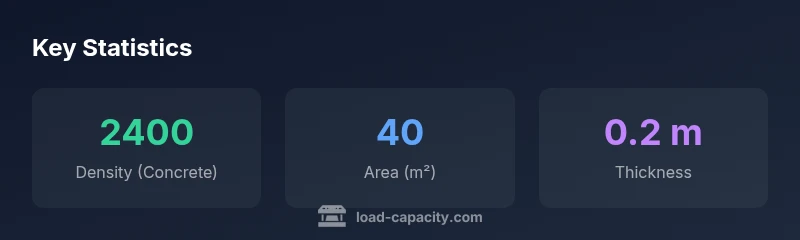
Consider a typical floor assembly with a 0.2 m thick slab made of a 2400 kg/m³ concrete and a 50 m² area. The mass per unit area is 0.2 × 2400 = 480 kg/m². Multiply by 9.81 and divide by 1000 to get ≈ 4.7 kN/m². For the entire 50 m² area, Total Dead Load ≈ 235 kN. This simple calculation does not include live loads or dynamic effects, but it provides a strong baseline for member sizing and foundation requirements. In practice, engineers compare this to code-prescribed dead loads and apply safety factors as required by standards such as local codes and design guides.
Another scenario might use steel decking with lower thickness but higher density. Even with a thinner profile, a higher density can yield comparable dead loads, highlighting the importance of material-aware design.
Common mistakes and how to avoid them
Common mistakes include using inconsistent units, neglecting material density variability, and forgetting to include all layers (subfloor, toppings, or coatings) in the thickness. Always document all material layers and confirm that the density reflects the exact material composition. Don’t rely on default values alone for critical projects. Validate results with manual checks or independent software and cross-check with code requirements to avoid underestimating dead loads.
Interpreting results and next steps
Interpret the calculator results to guide design decisions and safety planning. If the total dead load approaches or exceeds component capacity, consider increasing thickness, selecting a lower-density material, or adding structural reinforcements. Use the per-area load to compare against allowable floor loads and to prepare reinforcement plans. Finally, integrate the dead load results with live load analyses, environmental loads, and safety factors to form a complete, code-compliant design strategy.