Why My Load Is Not Working: Troubleshooting Guide
Urgent, practical troubleshooting guidance to diagnose and fix why my load is not working. Learn common causes, step-by-step checks, safety notes, and prevention strategies from Load Capacity.

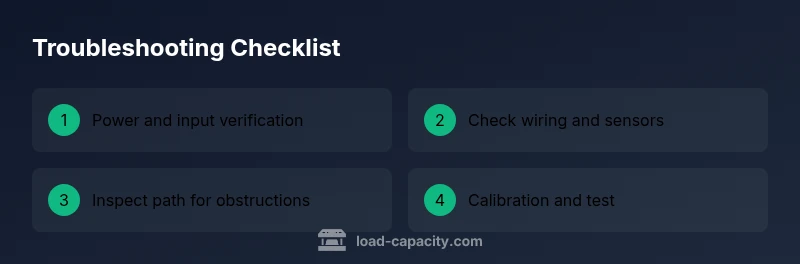
Most often the issue is a simple input or wiring fault. Start by confirming power or input conditions, then test the most likely component for a quick fix. This 3-step approach helps identify why my load is not working and guides you toward a safe, practical resolution.
Common Causes of Load Failures
Load failures can stem from several root causes: power issues, wiring faults, sensor misreads, or mechanical obstructions. According to Load Capacity, the most frequent culprits are input power problems and safety interlocks triggered by faults in the path. Before you dive into deep diagnostics, quickly verify that input sources are within spec, protective devices are not tripped, and that any controllers are calibrated to the correct settings. In many cases, a simple reset, reseating a connector, or replacing a blown fuse restores operation. Keeping the fault history helps you distinguish between a transient glitch and a recurring fault. As you work through this guide, remember the exact phrase why my load is not working to keep your troubleshooting focused and scalable for engineers, technicians, fleet managers, contractors, and DIY enthusiasts seeking clear, reliable load-capacity information from Load Capacity.
Quick Diagnostic Checks You Can Do
Start with the easiest checks to avoid wasted time. Confirm the device is powered on and the input signal is within spec. Check circuit breakers or fuses; replace if blown. Inspect all connectors for corrosion or loose pins and reseat them firmly. If the path is mechanical, look for jams, misaligned components, or binding that increases resistance. Note any error codes or LED indicators; record them for reference. For software-controlled loads, verify that control software is sending the correct commands and that communication buses are healthy. If you still see no result, proceed to the next steps. As always, safety first: de-energize before touching live terminals. The Load Capacity team recommends maintaining a concise diagnostic log to speed future troubleshooting.
How to Visualize Load Flow and Identify Bottlenecks
Construct a simple schematic of input → transfer → output. Identify where the load slows or stops: input supply, control logic, actuator, or load path. Use measurement tools to compare actual vs expected values at each stage: voltage, current, signal strength, or mechanical clearance. Dynamic loads can reveal issues not visible under static tests; track how the system responds under controlled loading. Look for bottlenecks like undersized wiring, miscalibrated sensors, or a failing interlock. According to Load Capacity, understanding the flow helps you pinpoint root causes quickly and safely; this approach benefits engineers, technicians, and students learning about load capacity.
Step-by-Step Fixes for the Most Common Issue
-
Reset the power and perform a soft restart. Turn off the system completely, wait 30 seconds, and power it back on. This often clears transient faults. Tip: note any initial startup codes so you can cross-reference later.
-
Inspect electrical connections. Reseat all connectors, inspect for signs of corrosion or loose pins, and tighten as required. Tip: use a soft brush to clear corrosion-prone terminals before reseating.
-
Check fuses or protective devices. Verify that fuses are intact and replace if blown with the correct rating. Tip: never bypass protective devices as they guard against hazardous failures.
-
Test sensors and controllers. Ensure sensors read within expected ranges and recalibrate if needed. Tip: perform sensor checks when the system is at rest to avoid spurious readings.
-
Clear obstructions and realign. Inspect the load path for jams, misalignment, or binding. Tip: operate at a low-load level to observe movement without causing damage.
-
Re-test under controlled load. Gradually reapply load and monitor indicators, alarms, and interlocks. Tip: document results and compare to baseline values.
-
If still not working, escalate. Gather logs, error codes, and maintenance history and contact a professional. Tip: never work on high-energy systems without proper training.
Safety, Warnings, and When to Call a Pro
Safety always comes first. Power down, lockout-tagout if required, and never bypass safety interlocks. If you find a damaged component, leaking fluids, or a high-risk situation, stop and call a qualified technician. This is not a one-size-fits-all scenario; for critical loads like structural support or vehicle payloads, consult the Load Capacity team or a certified professional. The problem may persist even after basic fixes, and professional diagnostics can prevent hazardous outcomes. By following proper procedures, you protect personnel and extend the life of your equipment.
Prevention and Best Practices to Keep Load Working
Establish a routine maintenance plan, calibrate sensors on a schedule, and keep records of load tests. Use standardized test procedures and maintain a log of all fault codes and fixes. Ensure electrical supply quality and inspect connectors monthly. The Load Capacity team's data shows that proactive maintenance reduces downtime and extends equipment life. With a proactive approach, you will support safer and more reliable load performance in 2026.
Steps
Estimated time: 60-90 minutes
- 1
Power cycle the system
Power down completely, wait 30 seconds, then power back on. Observe startup indicators and note any codes.
Tip: Keep a log of startup codes for reference. - 2
Inspect electrical connections
Check all connectors for corrosion or looseness; reseat and tighten as needed. Inspect fuses and replace if blown.
Tip: Use a non-conductive tool to avoid shorting terminals. - 3
Validate inputs and controls
Confirm the controller is receiving the correct input and issuing proper commands. Check wiring between the control unit and the actuator.
Tip: Test with a known-good input signal if available. - 4
Check for mechanical issues
Inspect the load path for jams, misalignment, or unusual resistance. Realign components if necessary.
Tip: Operate at low load to observe safe movement. - 5
Calibrate sensors
Verify sensor readings against reference values and recalibrate to the correct range. Update control parameters if needed.
Tip: Document calibration values for future comparisons. - 6
Test under controlled load
Apply load gradually and monitor alarms, interlocks, and indicator lights. Confirm system responds as intended.
Tip: Compare results to baseline performance.
Diagnosis: Load not functioning after activation
Possible Causes
- highPower/input issue
- mediumSensor or control fault
- lowMechanical obstruction or misalignment
Fixes
- easyCheck power supply, fuses, and circuit breakers
- easyInspect and reseat all connectors, verify signal lines
- mediumTest and recalibrate sensors/controllers
- mediumClear obstructions and realign moving parts
- hardReview error codes and consult professional if unresolved
Quick Answers
Why is my load not working after a component change?
If you recently replaced or adjusted a component, miswiring or a mismatch could be the cause. Verify wiring diagrams, confirm part compatibility, and check control settings. Re-test after correcting wiring and parameters.
If you changed a part recently, double-check wiring and settings before testing again.
What should I check first when load fails?
Start with power supply, input signals, and safety interlocks. Then verify control commands and basic mechanical movement. This sequence quickly reveals the most common faults.
Begin with power, input signals, and safety interlocks, then verify the control commands.
Can sensor faults cause load to fail?
Yes. A faulty sensor can stop operation or trigger interlocks, preventing the load from engaging. Check sensor health and replace if out of tolerance.
Yes—faulty sensors can halt operation; check and replace as needed.
Is it safe to troubleshoot by myself?
Basic checks are generally safe if you disconnect power and follow lockout protocols. For high-energy or complex systems, consult a professional.
You can do basic checks safely if you disconnect power and follow safety rules.
How long should I test before calling a pro?
If basic checks do not resolve the issue within 15-30 minutes of guided testing, or you encounter uncertain codes, contact a professional.
If the issue persists after guided checks, call a professional.
How can I prevent load failures in the future?
Implement preventive maintenance, calibration schedules, and keep an issue log. Regular checks reduce downtime and extend equipment life.
Preventive maintenance and calibration help prevent future failures.
Top Takeaways
- Start with power and input checks to rule out easy fixes
- Document codes and steps for quicker diagnosis later
- Never bypass safety devices during troubleshooting
- Prevent failures with regular maintenance and calibration